
 It's always a challenge finding things to sew for boys. But I sure do love finding projects and my oldest boy loves it too (little one is too young to notice!). So for Easter, I sewed my son a wallet to put in his basket. He loves it so much and it is so simple to make! Even better, I only needed a scrap of fabric I had left over from a different project! So, here's a list of supplies:
Scrap Fabric
Fusible Interfacing
6" zipper
Velcro Square
I am very much an "eyeballing it" type of person when it comes to measuring my projects, but I took measurements after I cut to give you an idea of the size. So, you need to cut (2) 7.25" x 3.25" rectangles, (2) 7.25" x 2.75" rectangles, and one 3" x 3" square. Additionally, cut one piece of fusible interfacing to match each set of rectangles. Iron the interfacing onto the wrong side of one of each rectangle size (see picture below if you're confused). Now you should have all your pieces ready for action!

You're going to start by folding your 3" square piece in half, right sides together and sew along the edge. Turn right side out and fold a bit of the top back inside and stitch close to the edge to create a finished edge. This piece will be your strap. So, you will no sew velcro onto the inside of the strap (over the seam) and near that finished edge you just sewed. Set the strap aside.


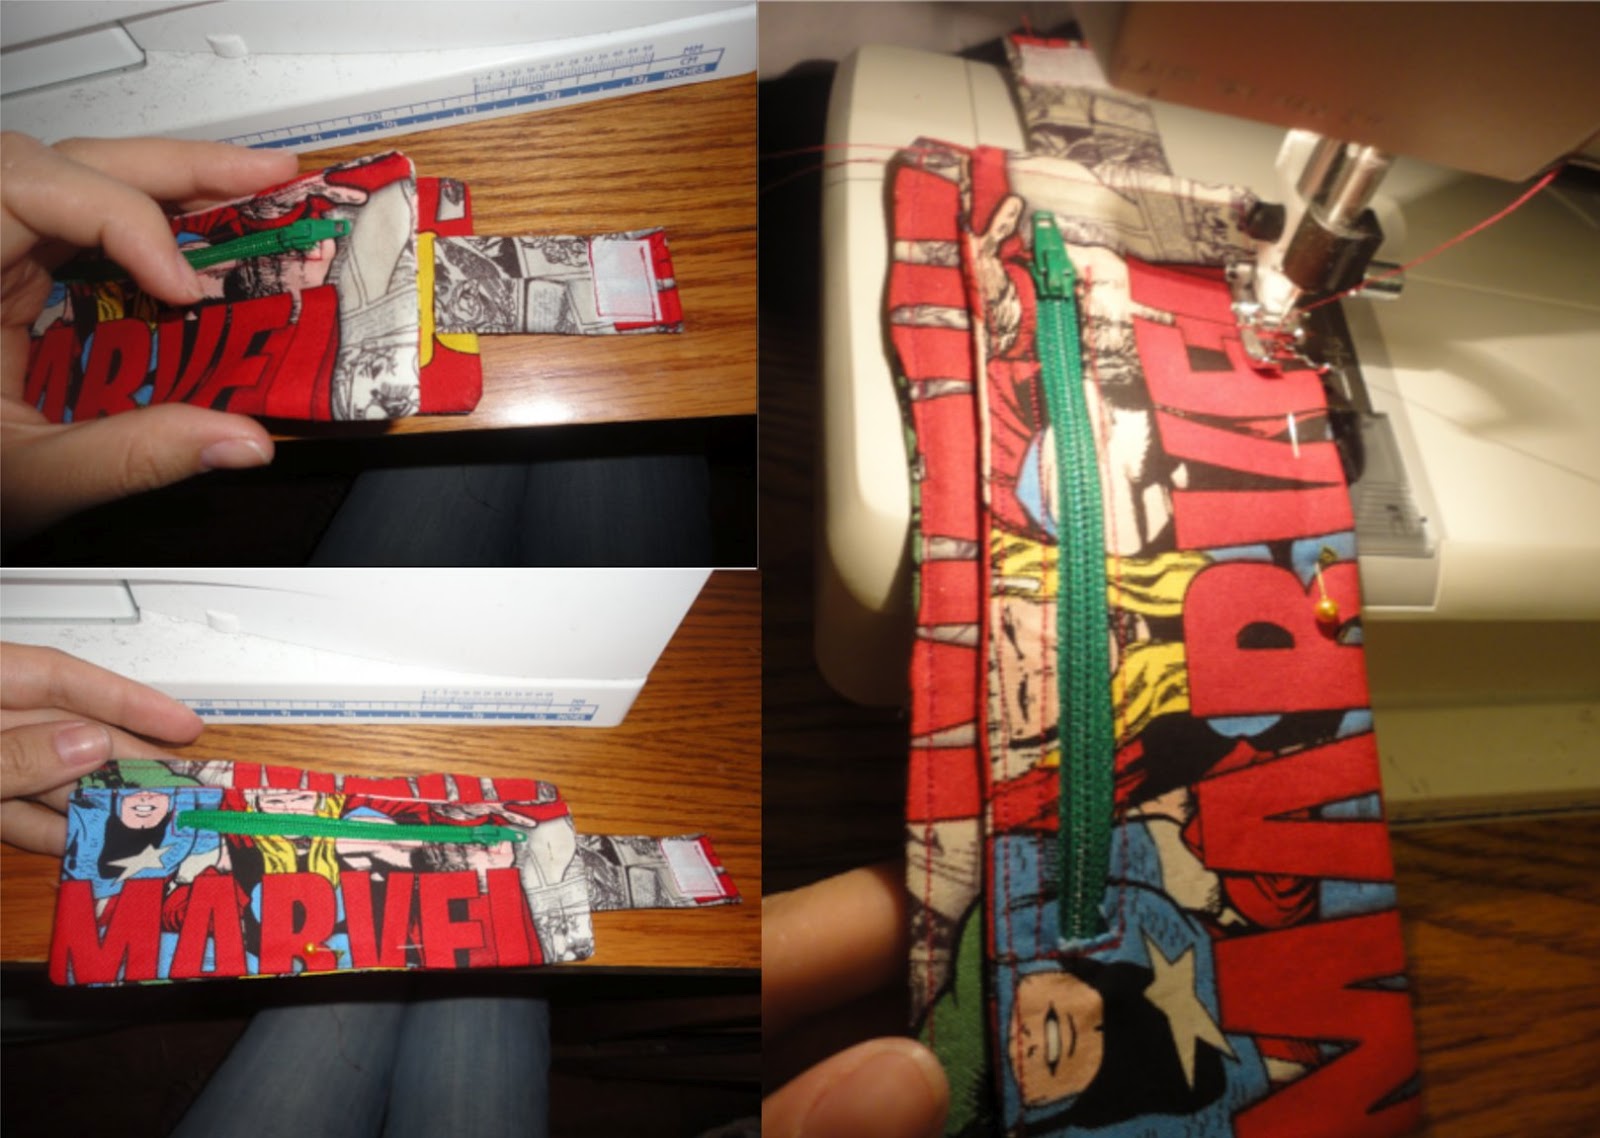
Now take your next set of rectangles. You need your interfaced piece and a ruler for this next step. On the interfacing, about 1" down from the top, you are going to draw a 5"straight line with your ruler. On the ends of that line, you will then draw little v's (see picture below). Cut along those lines.
Now you will fold the edges in of that opening and iron it flat. It should be a skinny rectangular opening with the flaps on the interfaced side. Now place your zipper onto the opening so that the zipper pull is against one side and pin it in place as shown in the picture. Stitch all around the zipper using your machine's zipper foot. If you need to shorten your zipper, be sure to stitch back and forth a few times over where you want it to end and snip off the extra!

Now put the two rectangles right sides together, sew around the edge with an opening, clip the corners, flip, iron, top stitch just as you did the previous set of rectangles!

love the super hero design! i wish i could sew let alone my boys! lol!
ReplyDeleteI love how the wallet came out. Even cuter in person. You should link this up to Craftgossip.com submit it. It is too cute!
ReplyDeleteThanks! And I will go check out that site!
DeleteLove the wallet! Thank you for commenting on my blog. I'm happy to have found yours!
ReplyDeleteSo delighted to discover you through the Summer {fun} Party!
ReplyDeleteAbsolutely love this wallet! Beautifully done!
Jenn/Rook No. 17